![]()
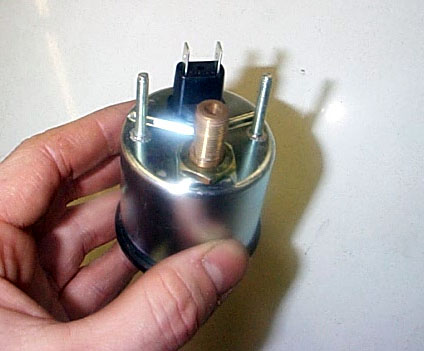
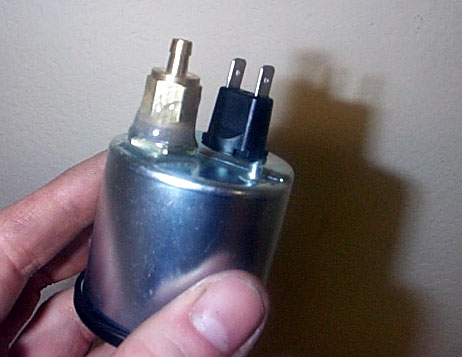
When buying a VDO boost Gauge from RRE, we modify the
hose connector so that it is easier to fit a vacuum hose to
the fitting that VDO has on the back of the gauge. To fit in a A-pillar pod, the studs and threaded boost
fitting must be shortened. Included in our kit is 6 feet of wiring and the necessary
connectors to hook up the gauge back lighting. Also included is a tee fitting and pressure
hose.
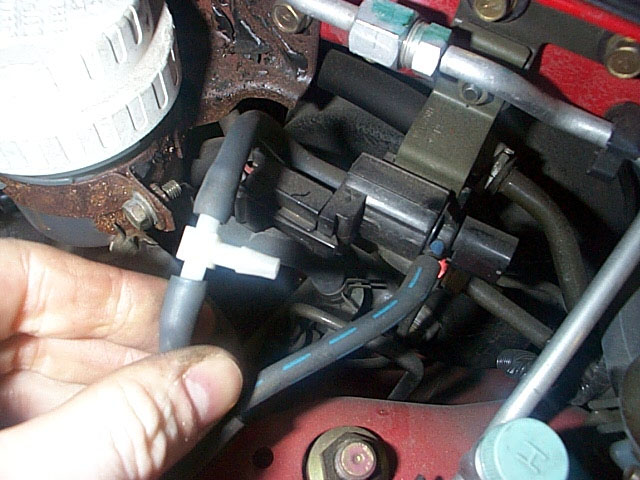
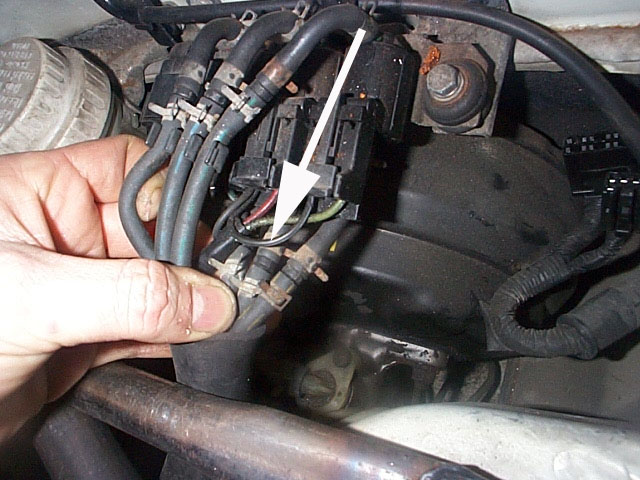
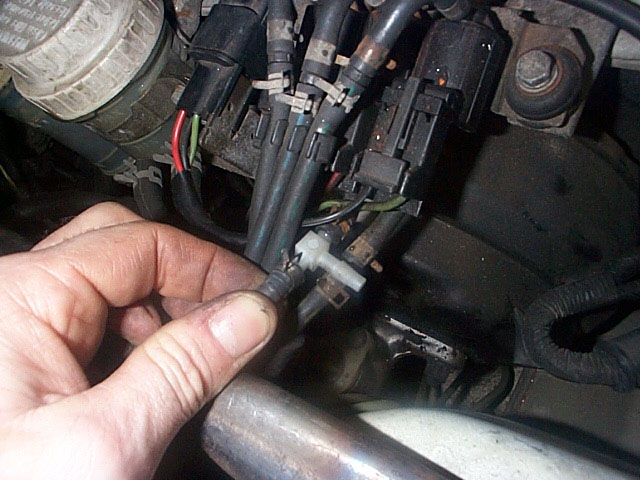
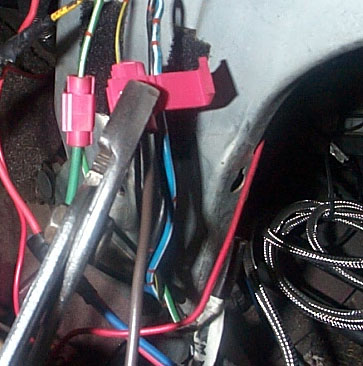
1. Tap the boost gauge hose into the hose that runs from
the intake manifold to the solenoid that controls the fuel
pressure regulator. This is the center solenoid on the
driver’s side of the firewall. Remove the double-ended
hose connector on the bottom hose of the solenoid and
install the tee in its place. Some prefer connecting to the "P" fitting on the throttle
body. Using this connection will not show vacuum on the
gauge. The reasoning behind going to the P fitting is that
by connecting to the fuel pressure regulator, you run the
risk of loosing pressure to the regulator should something
happen to the boost gauge hose. The solution is doing a nice
job of connecting the hose and keeping it safe. By
connecting to the regulator, you will be able to see if the
regulator is getting pressure. Nothing showing on the gauge,
means nothing getting to the regulator. With the hose
connected to the P fitting, you could loose pressure to the
regulator and never know. We like the connection shown, it
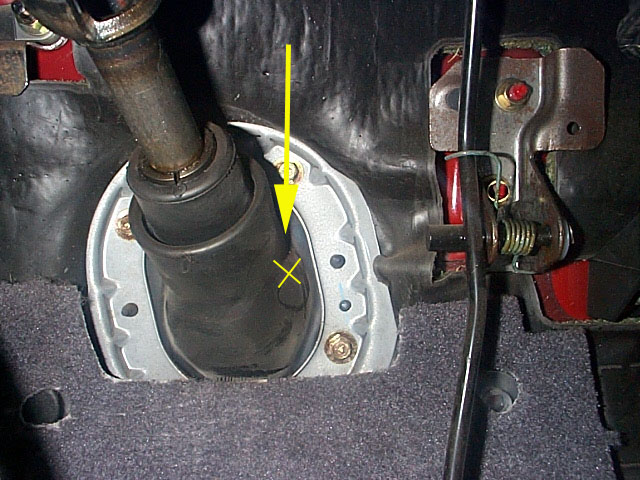
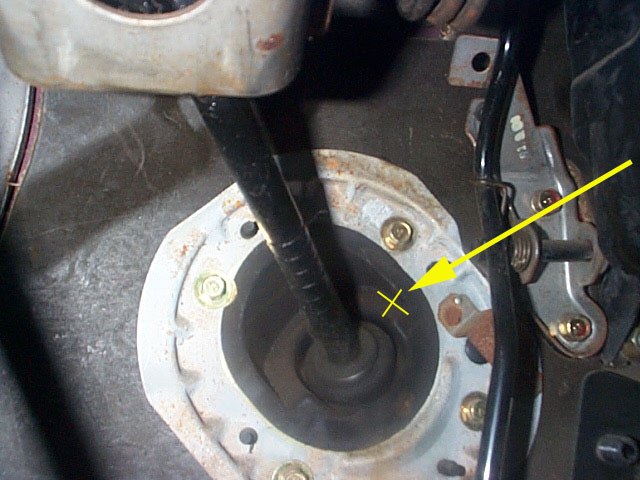
is your choice. 2. Run the hose from the tee fitting through the
firewall. You can poke it through either at the grommet for
the speedo cable or the boot for the steering column. Use an
Exacto knife and cut an X-shaped slot through the rubber.
Push the hose through this hole. Be careful routing the hose
under the dash so as not to interfere with the movement of
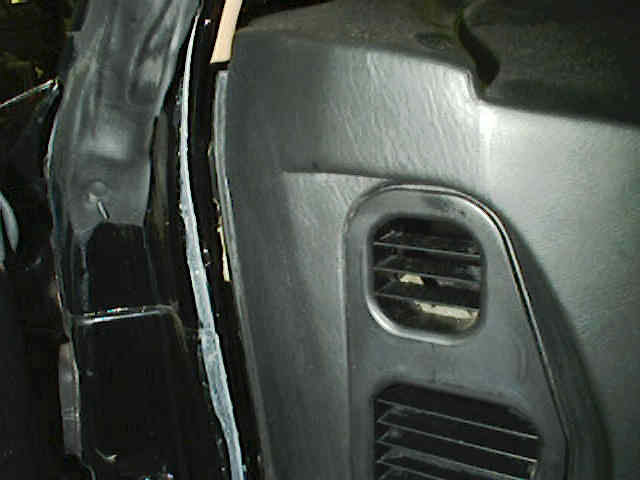
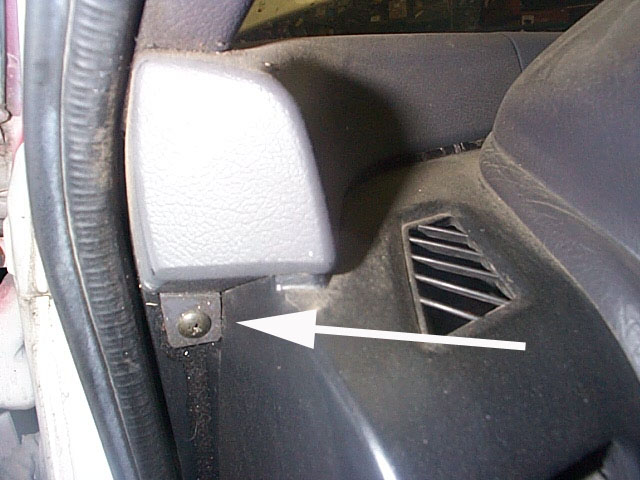
the pedals or steering column. 3. Remove the dash speaker panel for better access by
taking out the one Phillips screw and then slide the panel
towards you. 4. To mount the gauge pod, mark the desired position
first. Remove the A-pillar trim gently by un-snapping clips
and Velcro. Drill a 3/8” diameter hole (it will be
covered by the pod) for the hose and wires to pass through.
Clean the plastic very well with alcohol so the double-sided
tape will stick. Do not peel the tape off or stick the pod
on until the entire installation is complete and tested. You
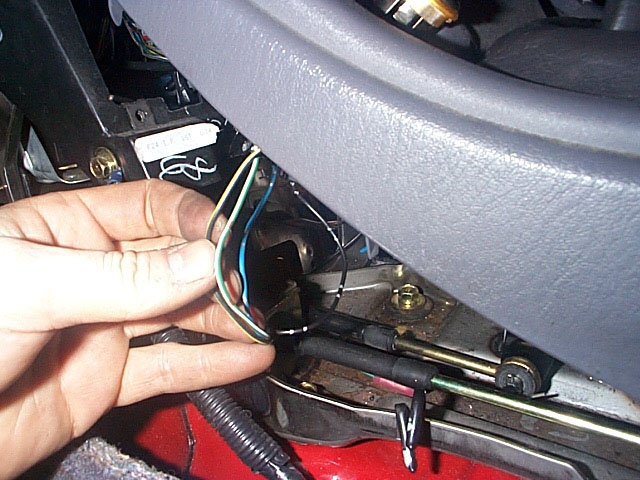
may also use screws to help hold the pod on. 1. Remove the carpeted panel on the left side of the
center console. (Pop off the plastic covers and remove the
Phillips screws.) You will notice a white, flat, rectangular
plug towards the upper front of the silver metal dash
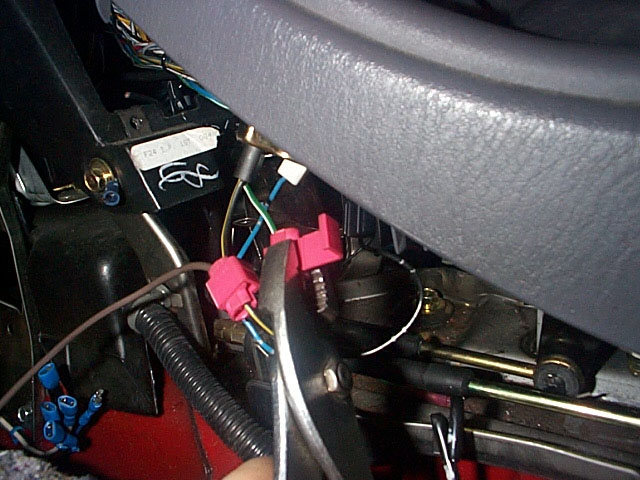
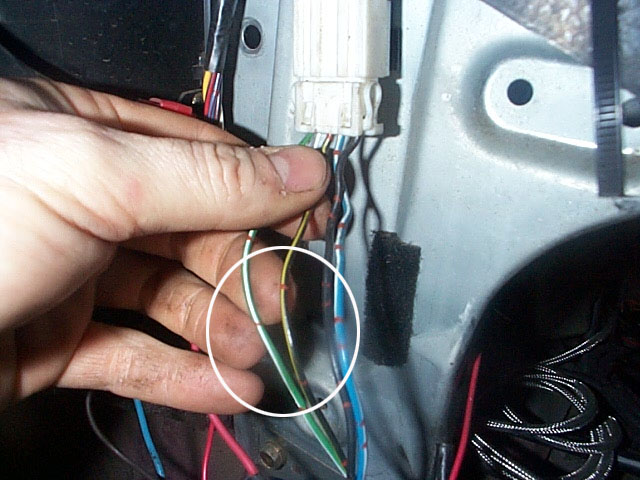
support. 2. The green wire with a white stripe is the positive
wire for the dash lights. Tap into this wire for power. 3. The black wire with a yellow stripe with the green
wire is the instrument light ground. The boost gauge light
must be connected to these two wires to dim properly.
1. Tap the boost gauge hose into the hose that runs from
the intake manifold to the solenoid that controls the fuel
pressure regulator. This is the center solenoid on the
driver’s side of the firewall. Remove the double-ended
hose connector on the bottom hose of the solenoid and
install the tee in its place. Some prefer connecting to the "P" fitting on the throttle
body. Using this connection will not show vacuum on the
gauge. The reasoning behind going to the P fitting is that
by connecting to the fuel pressure regulator, you run the
risk of loosing pressure to the regulator should something
happen to the boost gauge hose. The solution is doing a nice
job of connecting the hose and keeping it safe. By
connecting to the regulator, you will be able to see if the
regulator is getting pressure. Nothing showing on the gauge,
means nothing getting to the regulator. With the hose
connected to the P fitting, you could loose pressure to the
regulator and never know. We like the connection shown, it
is your choice. 2. Run the hose from the tee fitting through the firewall
through the boot for the steering column. Use an Exacto
knife and cut an X-shaped slot through the rubber. Push the
hose through this hole. Be careful routing the hose under
the dash so as not to interfere with the movement of the
pedals or steering column. 4. To mount the gauge pod, mark the desired position
first. Remove the A-pillar trim gently by un-snapping clips.
Drill a 3/8” diameter hole (it will be covered by the
pod) for the hose and wires to pass through. Clean the
plastic very well with alcohol so the double-sided tape will
stick. Do not peel the tape off or stick the pod on until
the entire installation is complete and tested. You may also
use screws to help hold the pod on. 1. Remove the plastic panel on the left side of the
center console. (Pop off the plastic covers and remove the
Phillips screw and pop out one plastic clip.) Look for the
wires running up towards the back of the cigarette
lighter. 2. The green wire with a white stripe is the positive
wire for the dash lights. Tap into this wire for power. 3. The black wire with a yellow stripe with the green
wire is the instrument light ground. The boost gauge light
must be connected to these two wires to dim properly. 4. Route the wires carefully so they don’t get
caught in any moving parts under the dash. 5.Run the wires down the crack between the dash and the
weather stripping from the gauge area down to under
the dash.